![]() This is a collection of preliminary random notes about the upcoming multiplayer. The information contained herein is subject to change.
This is a collection of preliminary random notes about the upcoming multiplayer. The information contained herein is subject to change.
NOTES
-
There’s no “mission failed” in multiplayer games. Everyone plays on until the mission is won. If you lose all your lives you carry on playing as a “zombie”, meaning your score will no longer increase.
-
You can play mission as multiplayer, except once-only missions. Any competitive mission played multiplayer will be automatically disqualified from leaderboards/rewards.
-
Only the host can pause a multiplayer game.
-
Press T to chat. The key is configurable in the Options menu.
-
Multiplayer games where the host and at least one other player are in the same LAN are supported.
-
To support rapid-firing weapons, the bandwidth requirements of CIU are twice those of previous episodes.
-
If you’re hosting a multiplayer game, ensure you consistently get 40 FPS minimum (60 FPS recommended).
-
Some elements of “Pro-gamer” mode (specifically, “raise powerups”) is decided by the game’s host and applied forcefully to all joining players. The rest is per-player, as usual.
LIMITATIONS
-
You can choose between 2 to 99 players. Be responsible. If you choose too high you’ll choke your network connection and make life painful for everyone involved. If you’re hosting a game, monitor your bandwidth usage (see below).
-
You can’t go in the Options menu while in a multiplayer game.
-
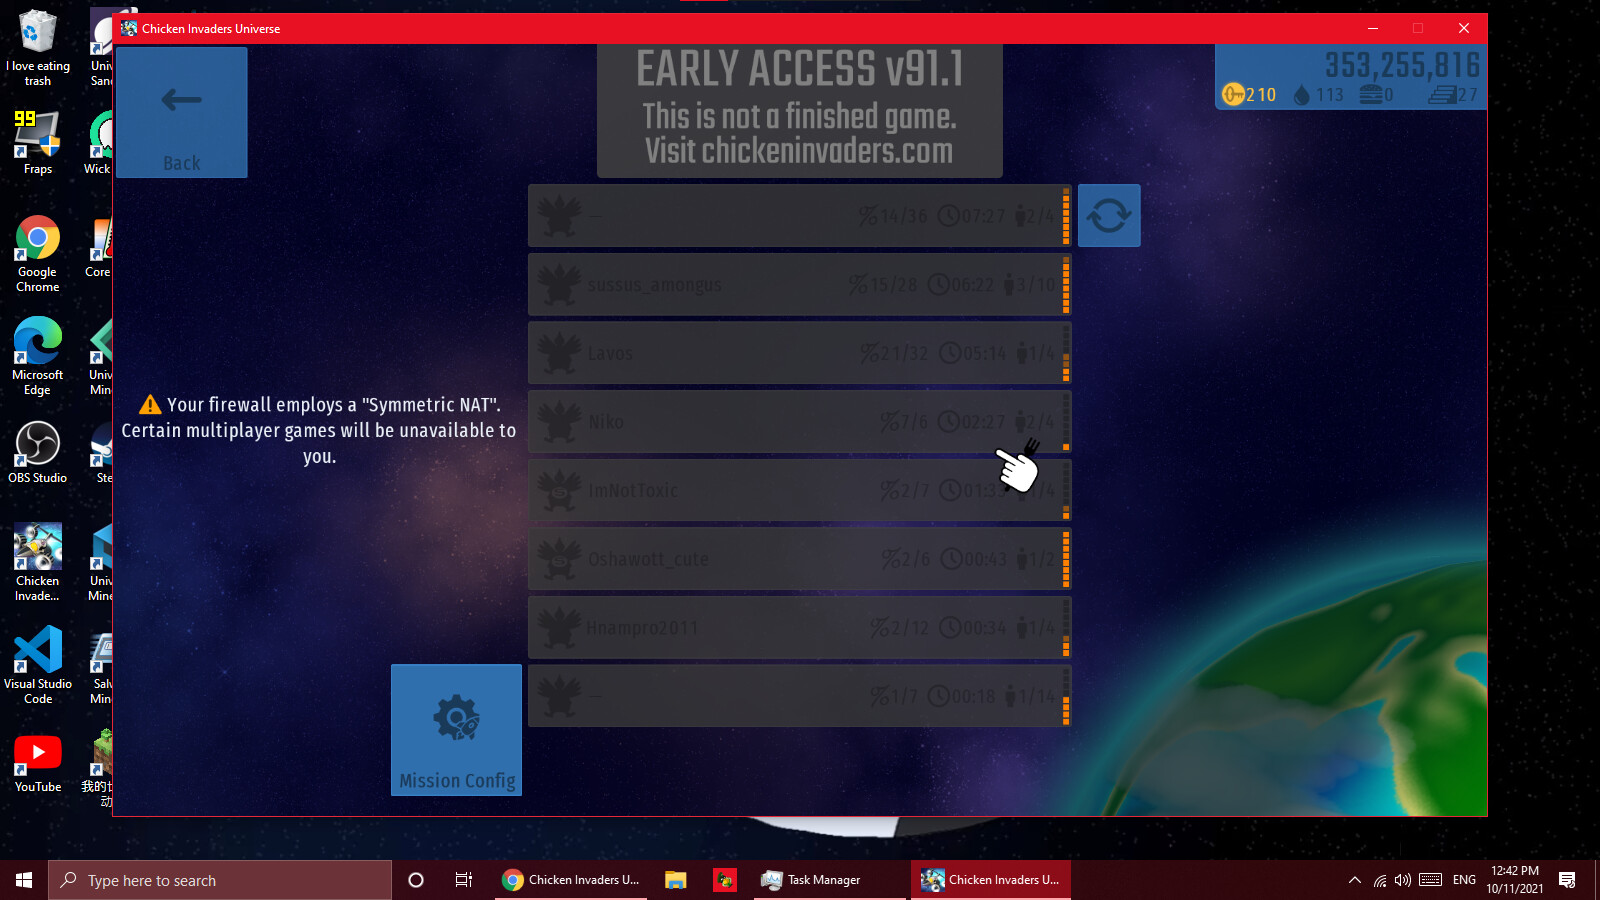
The game uses NAT hole-punching technology to route network traffic directly between players and not via a server. There are certain kinds of NAT (about 13%, as measured on the current player base) on which this will not be effective. If both sides use a problematic NAT (about 2%), then you won’t be able to connect. The game detects your NAT type and disables any unavailable games automatically. See also “NAT” below.
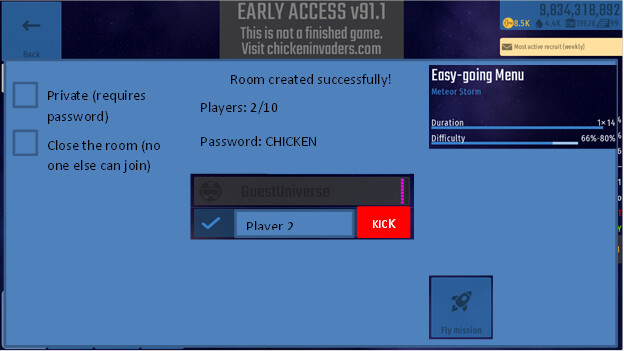
MISSION HUD
The multiplayer scoreboard is displayed at the top-right:

From left to right: Callsign, score, lives, firepower, ping, FPS, player shield color.
Further down on the right-hand side is the bandwidth monitor. It displays the network bandwidth currently used by the game (if you’re hosting a game, then this chart includes your own local loopback bandwidth, which never leaves your computer, so your actual bandwidth usage is lower than what the chart shows). This is what is should look like under normal circumstances, all nice and blue:
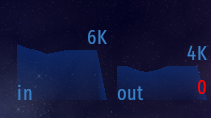
Under poor network conditions, the “out” graph will start showing red. This is not what you want:
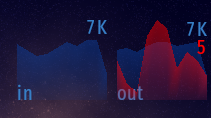
Nevertheless, it’s not clear who’s to blame for seeing red. It might be your own network connection, or one of the other players. It’s… complicated. Report experiences here.
NETWORK ADDRESS TRANSLATION (NAT)
NAT is part of your router. The game has no control over it. There are four types of NAT:
 Full cone
- Restricted cone
 Port-restricted cone
 Symmetric
| Stats as of Oct 2021 | % players |
|---|---|
| Full or restricted cone | 6% |
| Port-restricted cone | 78% |
| Symmetric | 16% |
If you have a “Full cone” or “Restricted cone” NAT, then all multiplayer games will be available to you (the game will say “you have full network connectivity”). If you have one of the other two, then bear in mind that:
- Communication between a “Symmetric” NAT and a “Port-restricted cone” NAT is not possible.
- Communication between a “Symmetric” NAT and other “Symmetric” NATs is not possible.
Some routers allow you to change which type of NAT they use (they might not call them with these exact names, or they may only have a checkbox to switch between two of the types).
FORCING A UDP PORT
Starting with v.92, it’s possible to force the game to use a particular UDP port when hosting/joining multiplayer games (from the main menu, choose Options → Network). This option is meant to help players with “Port-restricted cone” or “Symmetric” NATs.
![]() Only change this setting if you know what you are doing. Improper values may crash the game, or prevent you from playing multiplayer games altogether.
Only change this setting if you know what you are doing. Improper values may crash the game, or prevent you from playing multiplayer games altogether.
Note that simply setting this option will absolutely not help you connect any better. You must also perform manual configuration on your router. Specifically, you need to do two things:
-
Static IP: Ensure that your computer is always receiving the same IP from your router’s DHCP.
-
Port-forwarding: Set up a rule to forward any UDP traffic from the internet to your local IP and game port.
The process to do this depends on your router, so you’ll need to consult your manual.
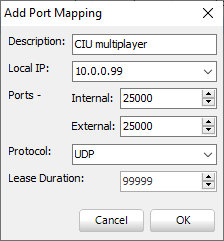
![]() Alternatively, if your router supports UPnP, you might be able to configure it using a graphical utility such as UPnP Wizard - Port Mapping Tool . Note that UPnP leases expire, so you’ll need to do this every few hours, but at least you won’t mess with your router directly. You also don’t need a static IP when using this tool.
Alternatively, if your router supports UPnP, you might be able to configure it using a graphical utility such as UPnP Wizard - Port Mapping Tool . Note that UPnP leases expire, so you’ll need to do this every few hours, but at least you won’t mess with your router directly. You also don’t need a static IP when using this tool.
Force UDP port
Set a random value here. Recommended range: 10000-30000. The port needs to be free. If the game crashes, it means that the port is already used and you need to find another free port.
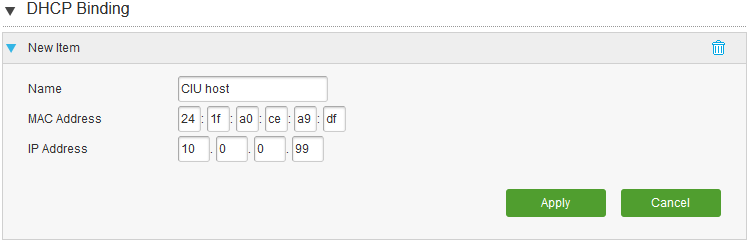
Static IP
Routers normally use DHCP to assign IP addresses to their connected devices (including your PC). These IPs change over time. However, there is typically an option called “static IP assignment” or “LAN server” (or something similar) which will nail down a device to a particular IP forever. You need that to ensure that your PC is always receiving the same IP (which is required for port-forwarding to work).
In order to assign a static IP, you typically need your MAC address (your router should be able to tell you what it is, if you look at its currently connected devices, or run ipconfig /all in a command prompt and look at “Physical Address”). If your router can port-forward directly to a MAC address (instead of an IP address), then you don’t need a static IP at all.
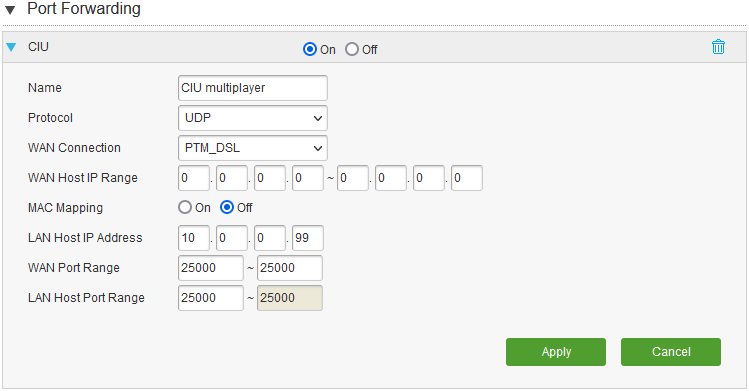
Port forwarding
Routers typically block all incoming network traffic (unless this traffic is a response to a request made from a computer inside your LAN). However, you can set up rules so that traffic arriving at a particular port “from the outside” is forwarded to a particular IP on your internal LAN no matter what. You can use “port forwarding” (also called “port mapping”) to ensure that your computer is reachable by other players, regardless of your router NAT. Set up a rule on your router to forward all UDP traffic on the game port to your internal IP.
Example:
Assume your LAN IP addresses are of the form 10.0.0.xxx, and that your MAC address is 24:1f:a0:ce:a9:df
-
In the game, set “Force UDP port” to 25000.
-
On your router, assign static IP 10.0.0.99 to your computer.
(This is only a sample. Your screen will look very different) -
On your router, port-forward external UDP port 25000 to internal port 25000 on IP 10.0.0.99
(This is only a sample. Your screen will look very different) -
Alternatively to (2) and (3), if you’re using UPnP Wizard - Port Mapping Tool , add this mapping:

If this still doesn’t work, keep reading.
CARRIER-GRADE NATs
Sometimes you set up your router correctly, and you still can’t communicate with other players. This is because you are in fact behind TWO NATs:
-
The first one is your router’s NAT, which you can directly control (via web interface, or UPnP).
-
The second one is a carrier-grade NAT ( Carrier-grade NAT - Wikipedia ), and that is controlled exclusively by your ISP.
In other to communicate directly with other players, both NATs need to allow network traffic through.
Here’s how you can tell if there are two NATs involved: Somewhere in your router’s settings, your external/public IP is shown:
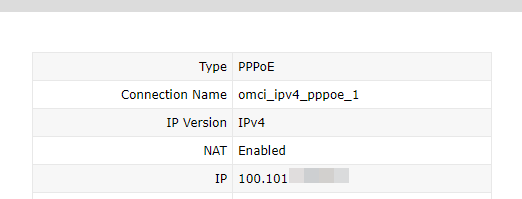
Check whether this IP matches what various websites report as your external/public IP (for example, https://whatismyipaddress.com )
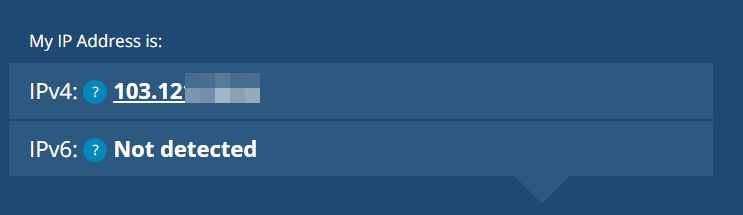
If these two IPs do not match, then you are using two NATs. The only way to solve this is to contact your ISP and explain that there are services running on your PC that need to be accessed through the public internet. They will then (probably) disable their own CGNAT for your particular connection. You can tell when their CGNAT is disabled because the external/public IP reported by your router will match what the websites report.