Post your paintjob!

no it’s not

I know

Yours is a little darker.

This topic was automatically closed 14 days after the last reply. New replies are no longer allowed.

Tutorial: How to make this:


In CIU

For those who don’t know, this ship appeared in the cutscenes of Chicken Invaders 2: The Next Wave as a gag where the Authentic Hero got caught speeding.


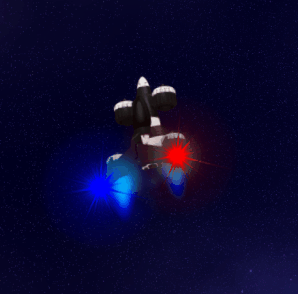
What you’ll be creating:
Space Police 2

Note: this is the most accurate replica I have been able to manage as of 46.0 - if you are reading this at a later date, there may be better versions possible.
I will try to keep this tutorial up-to-date, but if I update it I will also update this section indicating which version it was made in. :wink:

If you have come here from my replica in the spaceship topic please be aware that one is also a version older, and slight improvements have been made. Additionally this tutorial itself has received a few updates, and not all the images will show the most recent version, but if you follow the instructions it should match the spaceship you can see in the .gif above. :wink:

Model

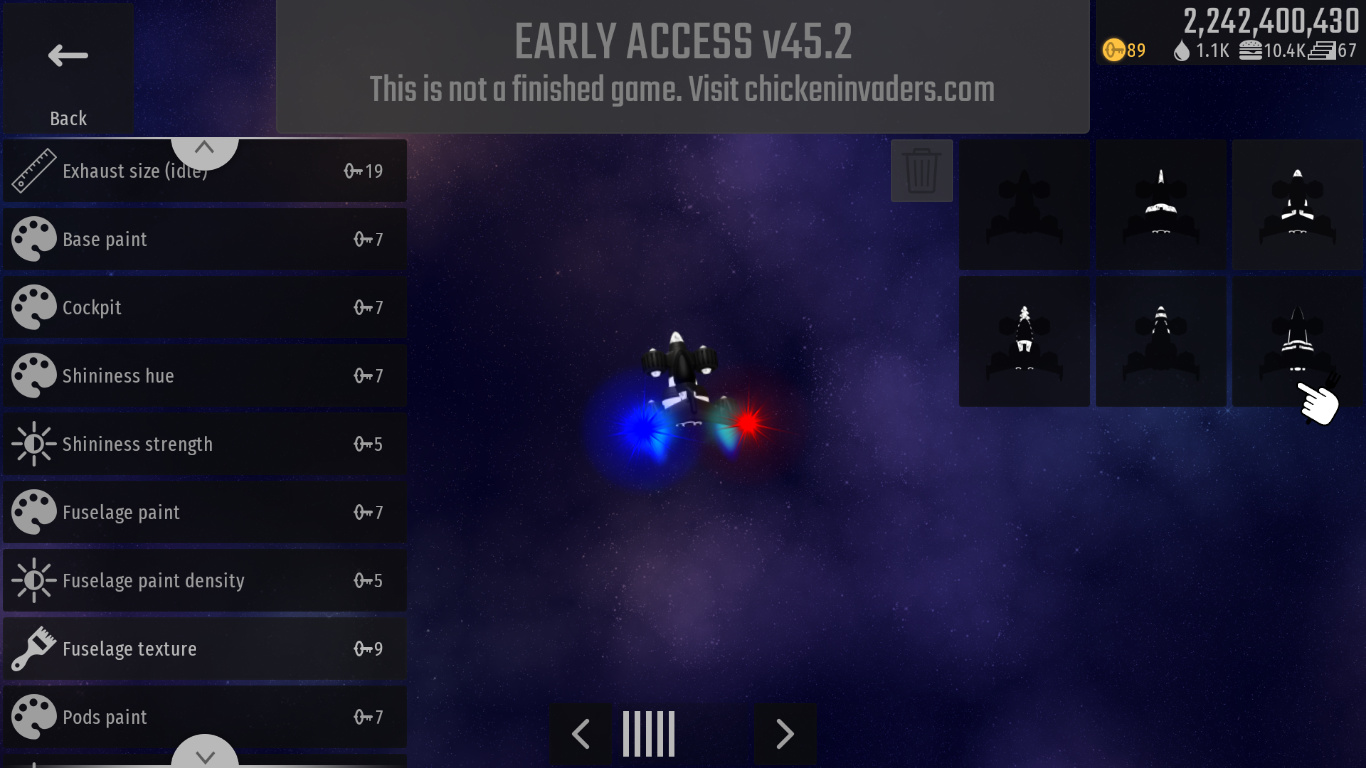
Obviously, the original ship is a Muller, so unless you’re going for a spin-off (which could actually be really cool, especially for a bomber…) I’d stick with a Muller.

The exact model for the police ship actually doesn’t exist in CIU; the shape of the Police Ship itself is actually slightly smaller than the model the Hero flies, and has a straight tail wing as opposed to a swept one.

Engine count is the only thing that varies between Muller types, so it’s a question of 1 or 2. Really, whether you choose a Deliverer or a Cuisiner is up to you (I wouldn’t bother with a Caterer unless you can’t afford a Deliverer though, as they both have the same number of thrusters) - the original technically has two thrusters, but they’re much closer together than the thrusters on the hero ship, so you can get away with one if you prefer. I am using a Cuisiner for this tutorial, though.

Basic Colours

You’ll want to make the Base Paint the darkest available in the “basic” colour selection template.


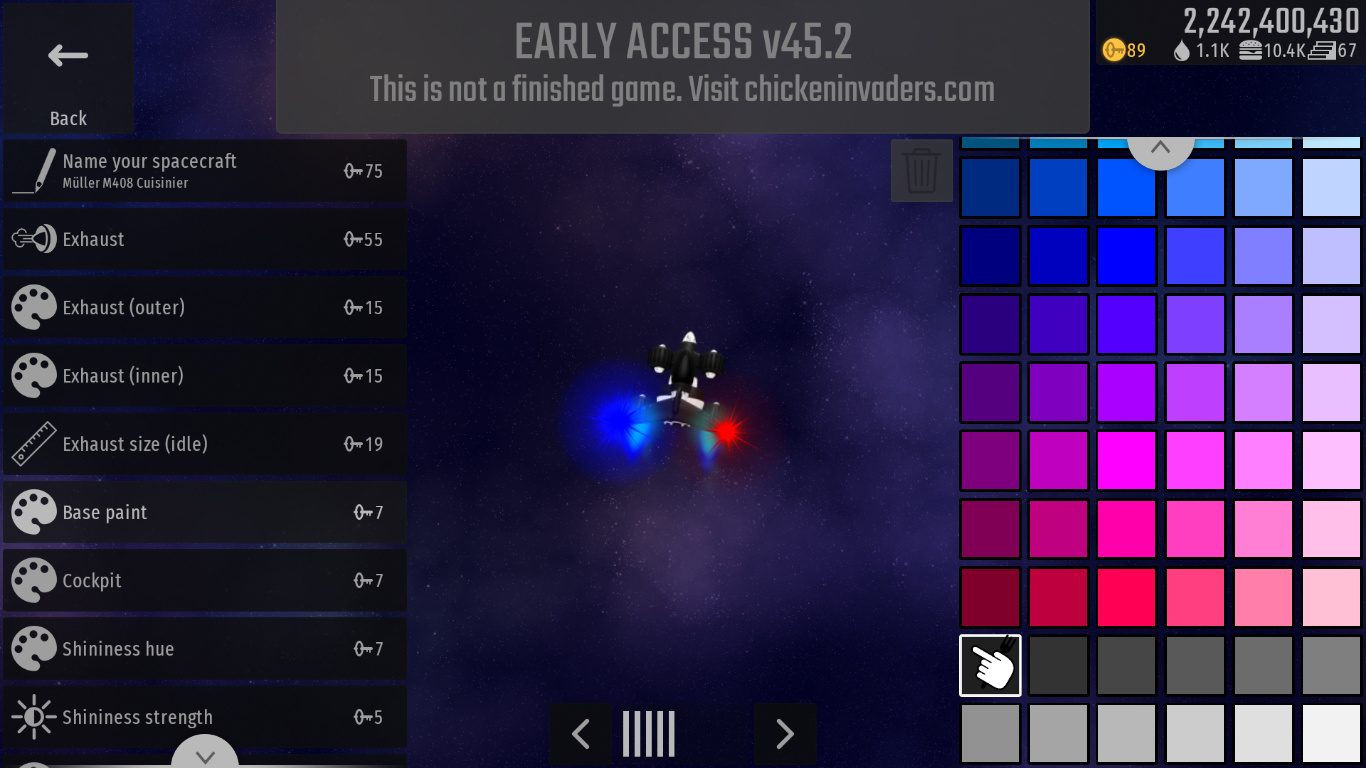
Then make the cockpit as black as is possible (0,0,0) using the “Advanced color selection”, so it appears slightly glossier than the fuselage.

Shininess

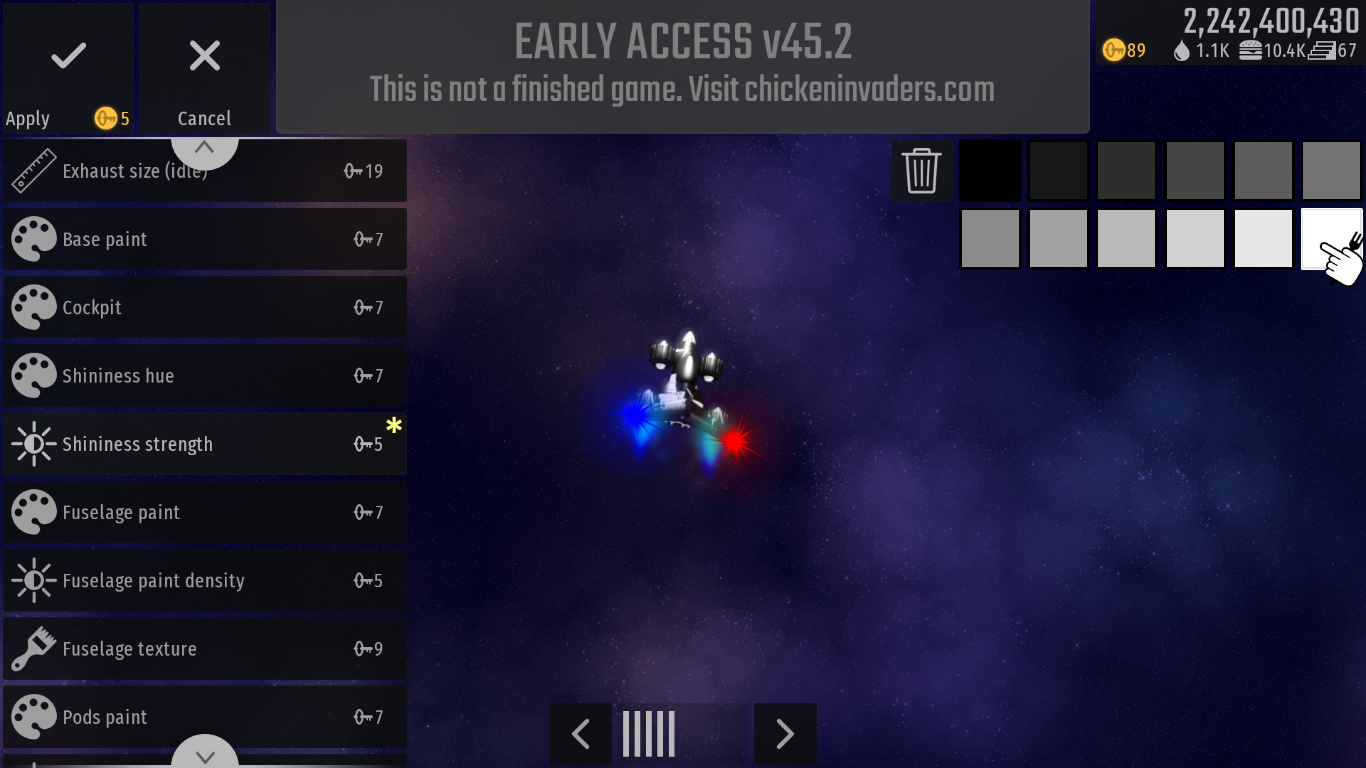
This is interesting - the original game just had a single 2D image, rather than a series of sprites, so the reflection is pre-drawn and it’s hard to tell how bright you should make it. I set the strength to one block above none, kind of as a callback to the static sprite and low-tech graphics of the original:

This is kind of preferential, though, depending on how you interpret the original. One things for sure though - the colour is pure white. :wink:

For comparison, click here to see a super shiny version - it didn't feel right to me, but you might prefer it, or maybe somewhere between the two.

Paintjob

For all the paint, pure white at the highest possible density is best, I find, to achieve the simple and well-defined look of the original.

You cannot perfectly match the paint job, but there are some solid alternatives. For this tutorial, I recommend the second fuselage paint job, as it has both the distinctive white nose cone and also adds some extra detail around the cockpit, even though that detail is differs to the original:


The weapon pods can be replicated almost perfectly with the seventh style:

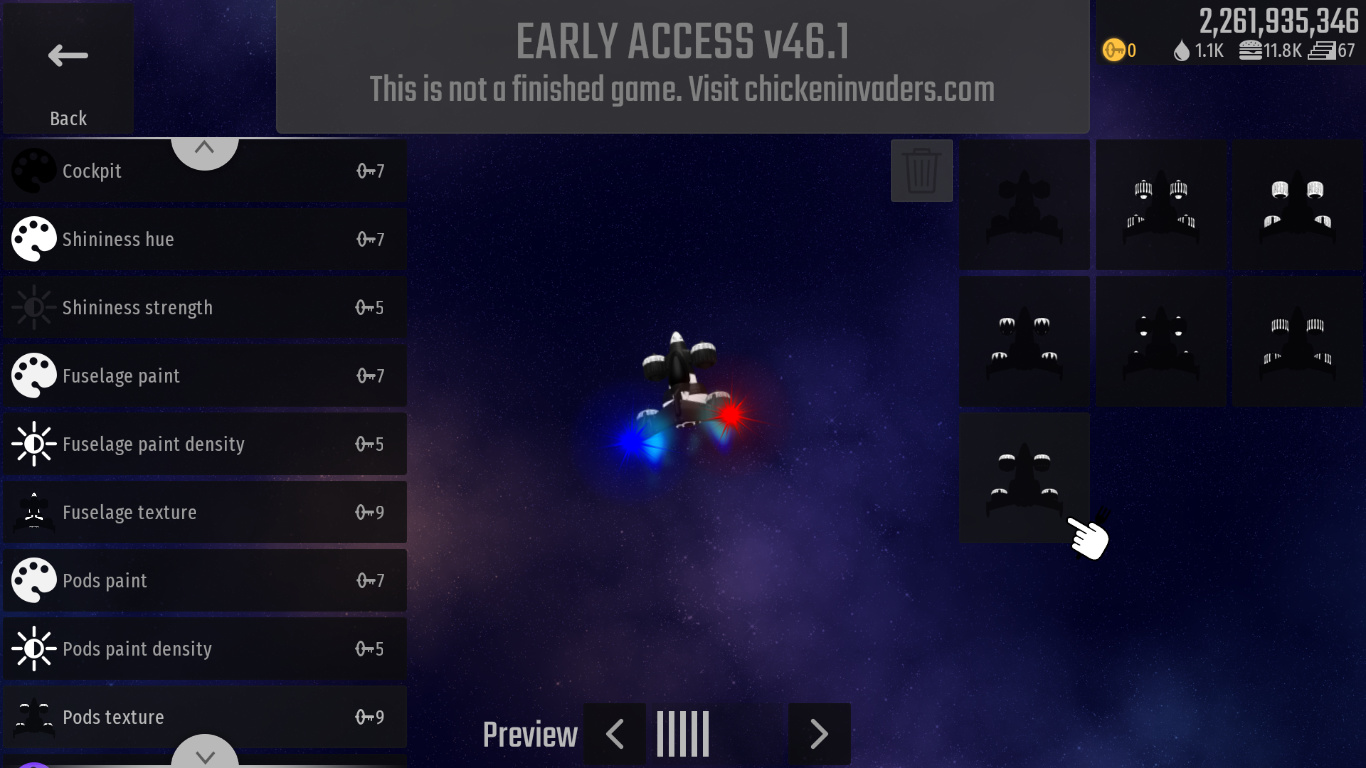
EDIT: You can also use the new “Fuselage Trim” paint job to get the white rim for the ship cockpit.

The original ship also has no paint on the wing, so I wouldn’t bother with any, either. (You can save keys by not recolouring/texturing this as well, if on a budget. Just set density to nil. :wink: )

Exhaust

So pretty quickly, style 8 becomes obvious as a really good CI/CI2 replica:


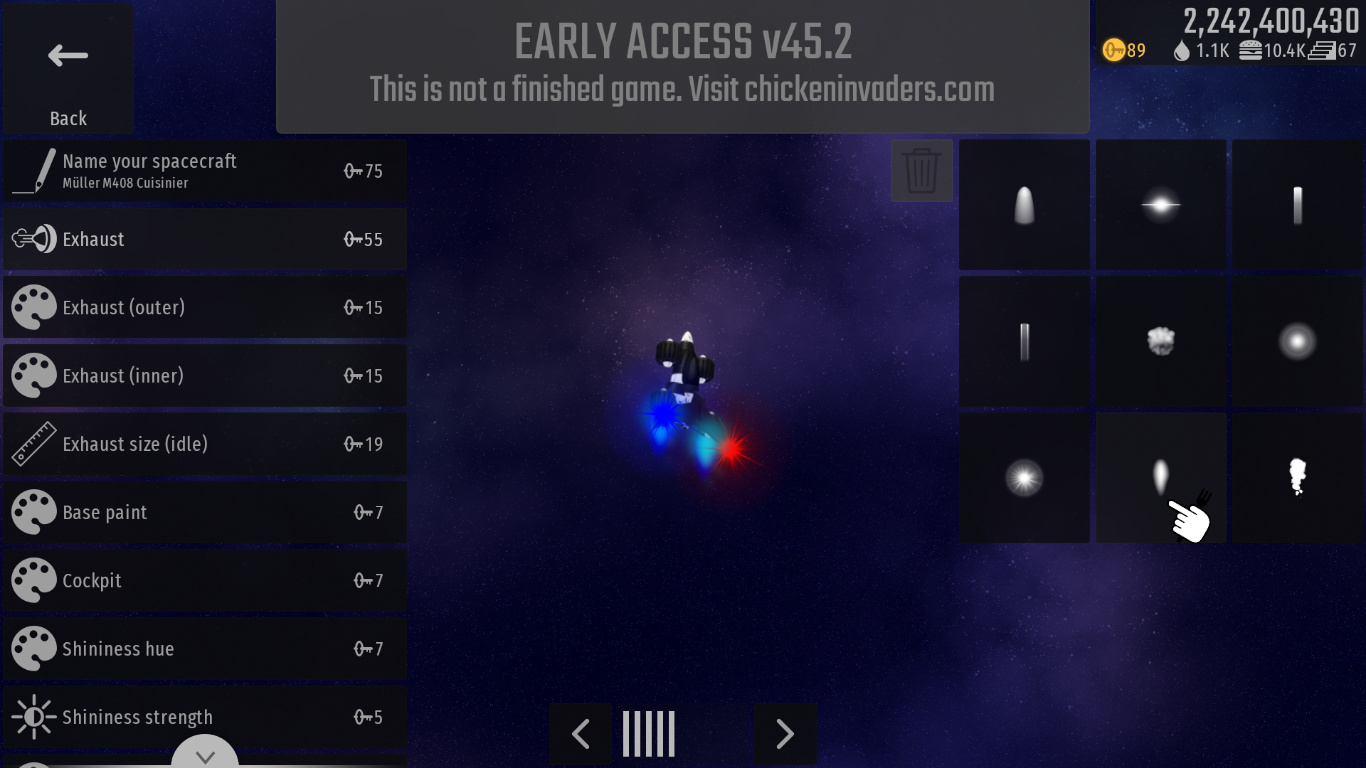
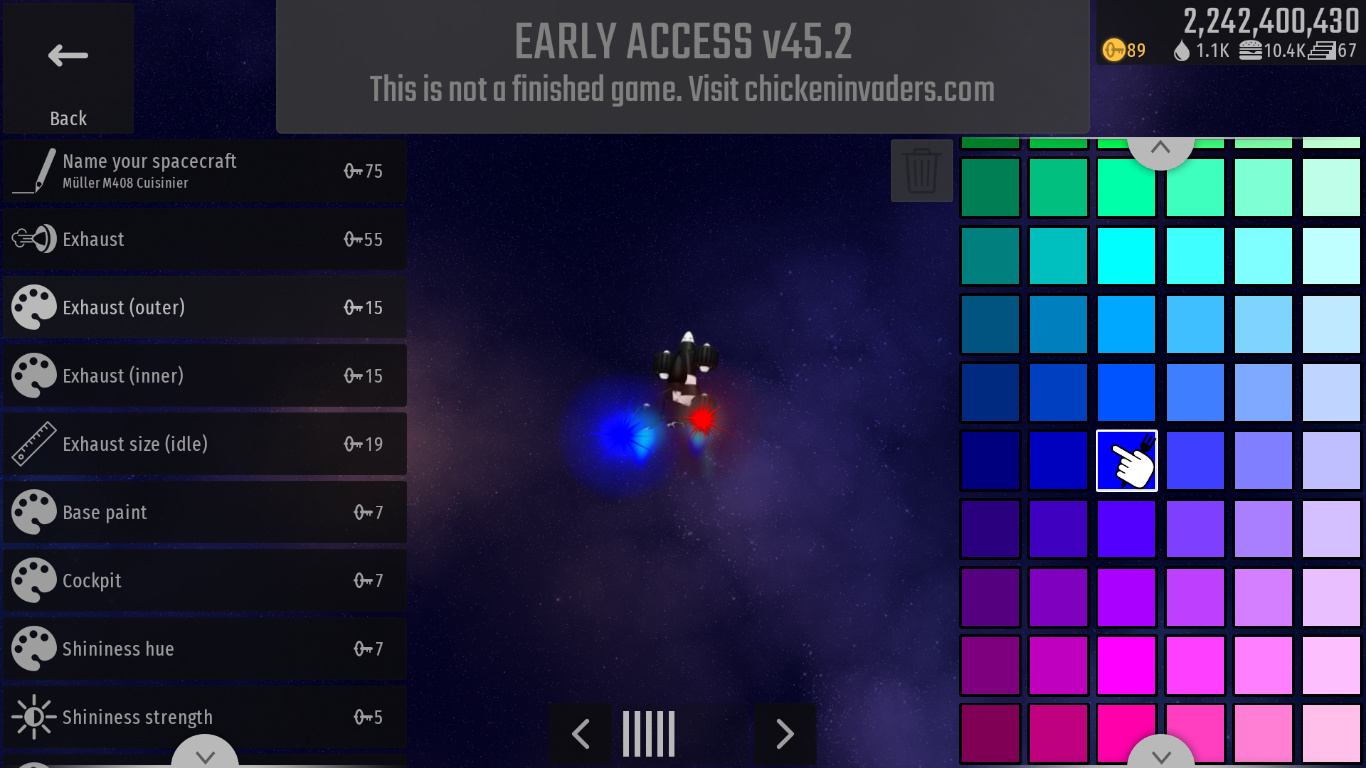
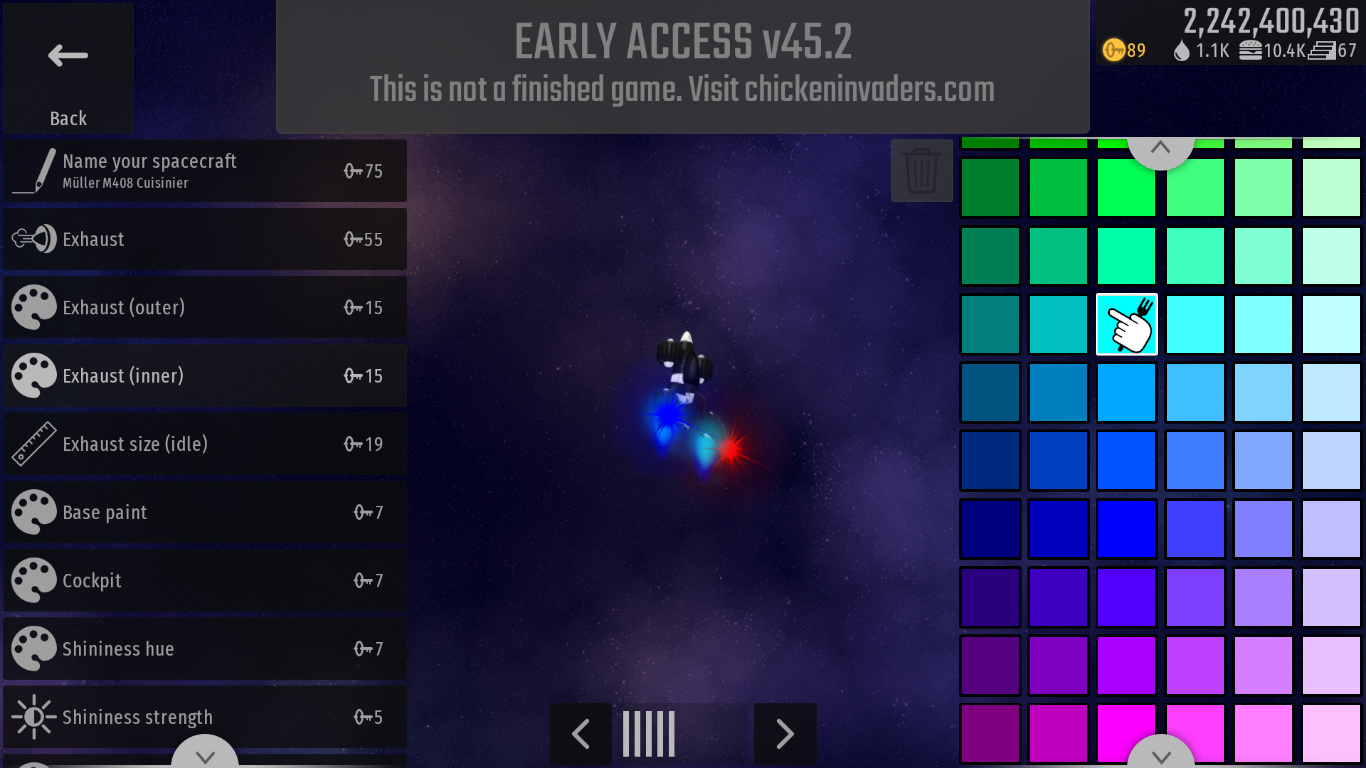
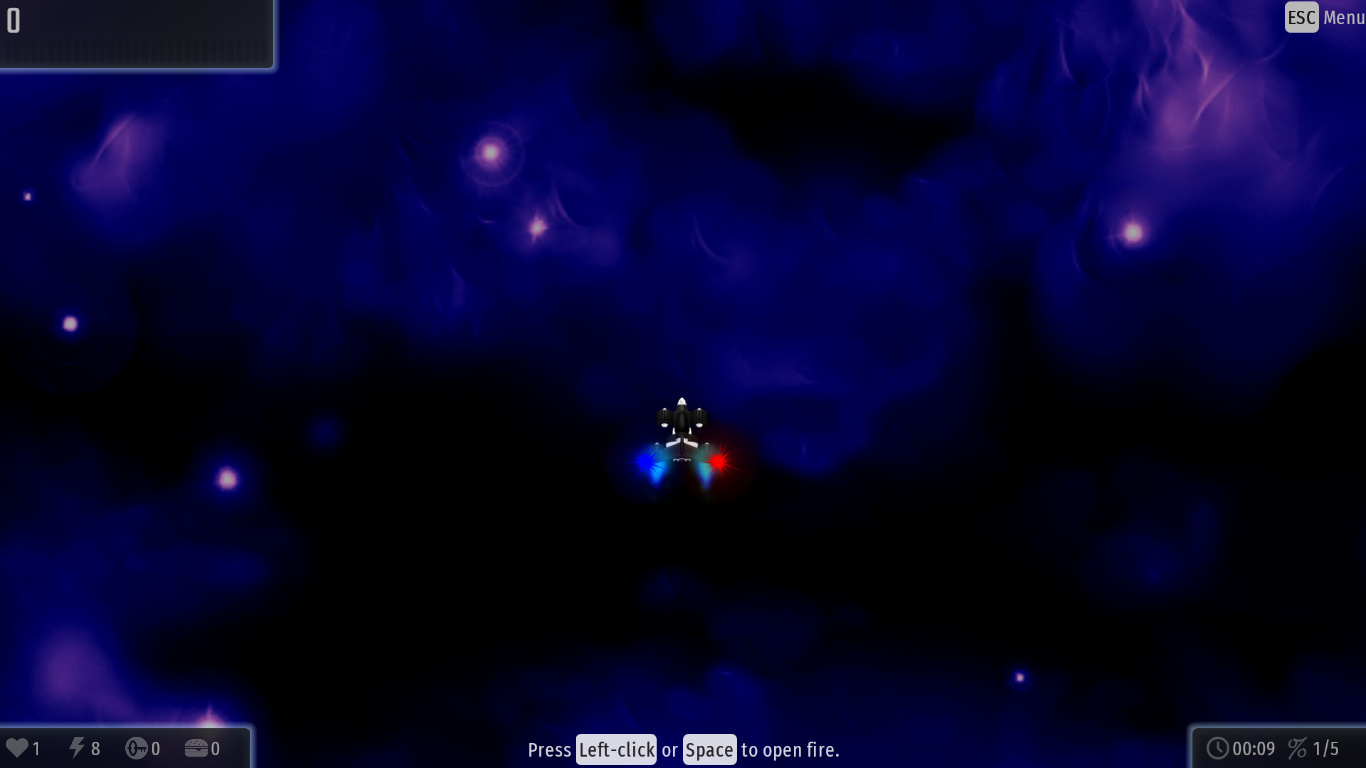
The color that I found best was making the outer exhaust pure (0,0,255) blue, and the inner exhaust this light blue (0,255,255, I believe):

I didn’t change the exhaust size from default (that’s 14 bars, if you’ve changed it previously) - but if you’re using a single-engine model, you might want to crank it up a few bars above that to suggest at the double-engine.
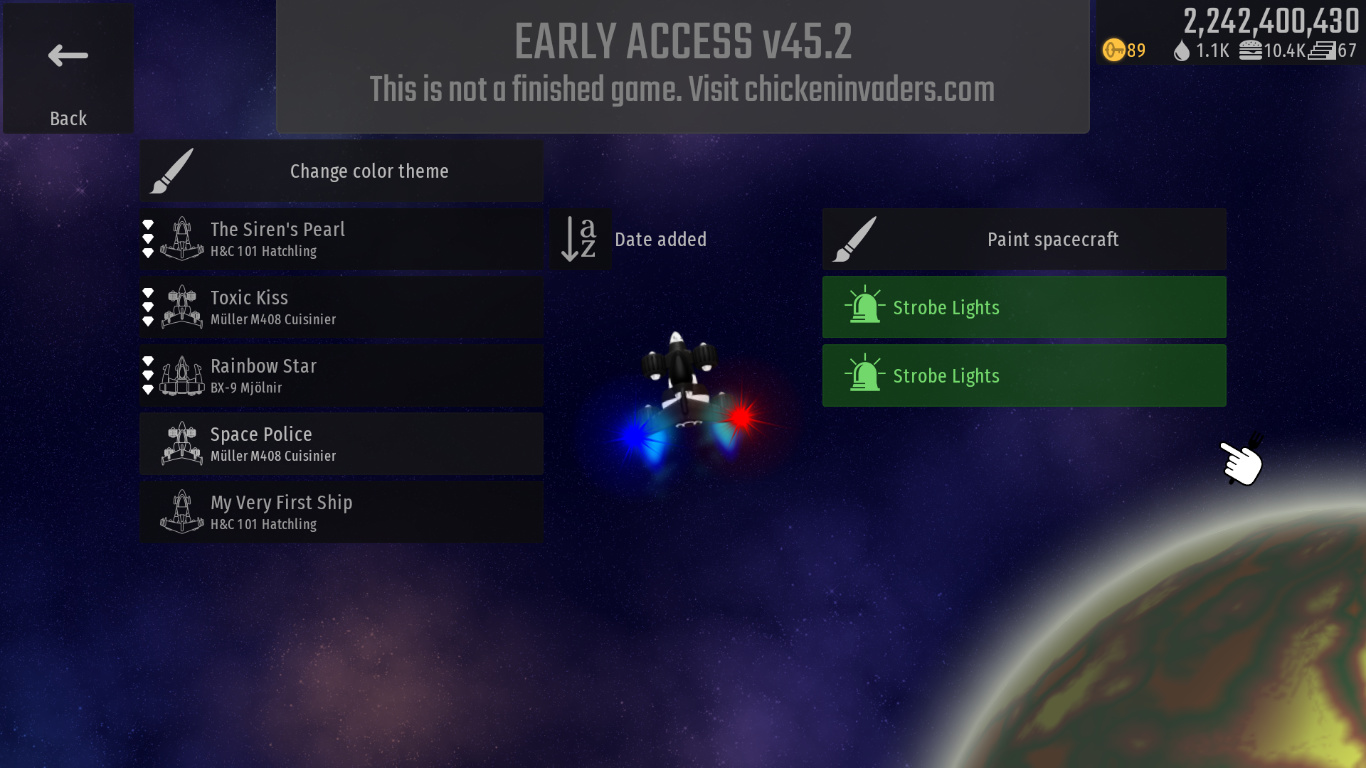
 :wink:

Hardpoints

You will need at least two strobe light pairs (yes, two).


You could also, potentially, add a pure white ghost trail with shrinking to mimic the “smoke” the old thrusters had, but I don’t think this would really achieve the right effect so I wouldn’t recommend it.

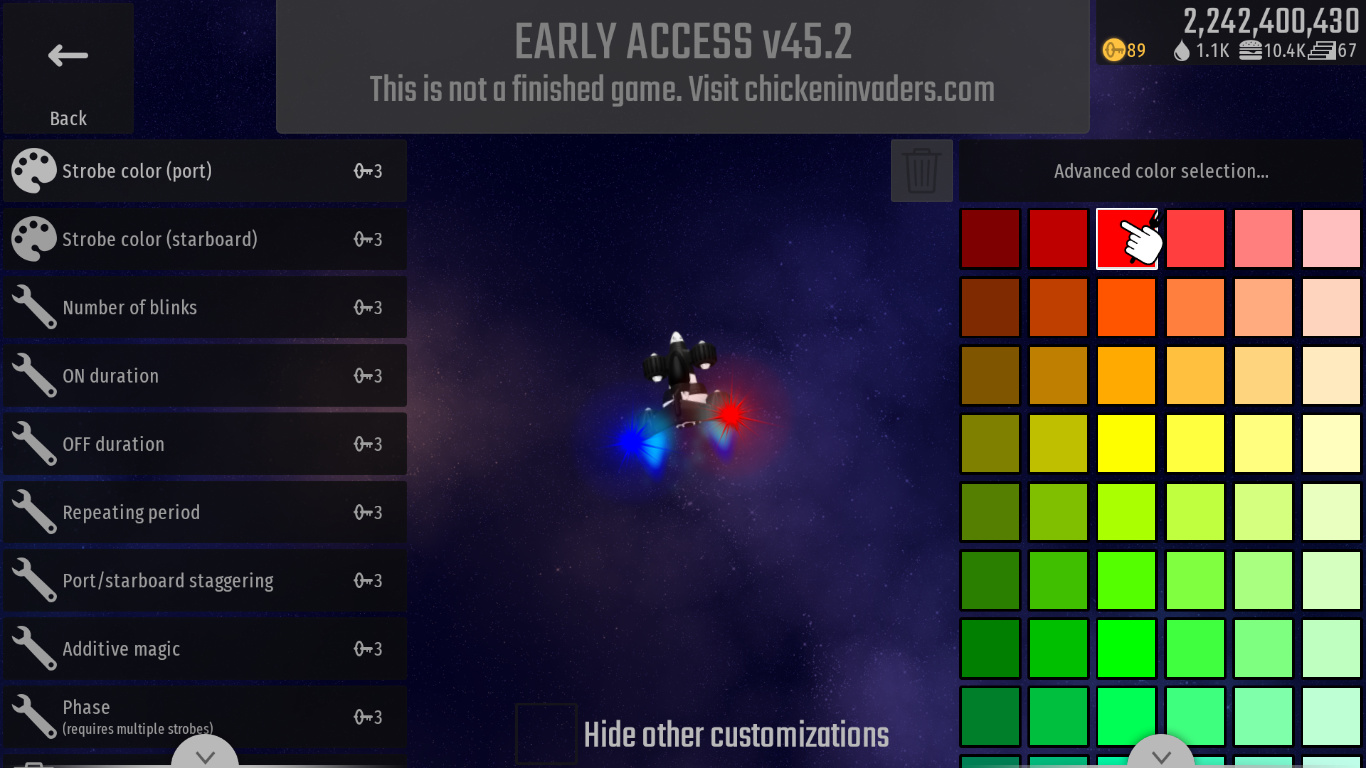
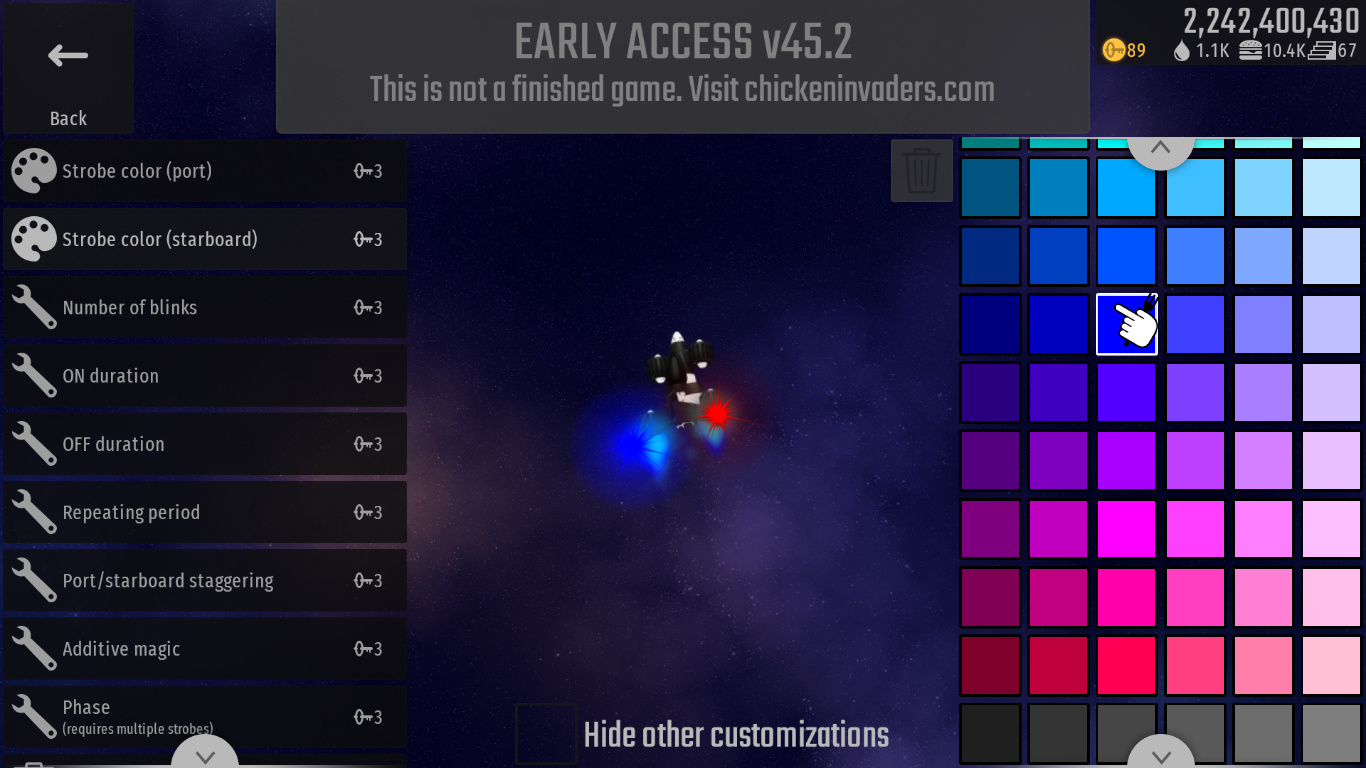
The first pair is the lights themselves, which if you look in CI2, are always on. You will want pure blue for port (0,0,255) and pure red for starboard (255,0,0)

You will want these lights to be constant, as the CI2 version always had coloured bars on each wing (and they never swapped sides). One way to achieve this constancy (there are a few, experiment if you’re being stingy with your keys) is:

  • Maximum number of blinks
  • Maximum ON and OFF duration
  • Minimum repeating period

Port and Starboard staggering shouldn’t have an impact on this, depending on how you’ve done it, but if for some reason it does, just mess around until both lights are constant.
Placement 1, maximum strobe size - and you won’t need to mess with phase.

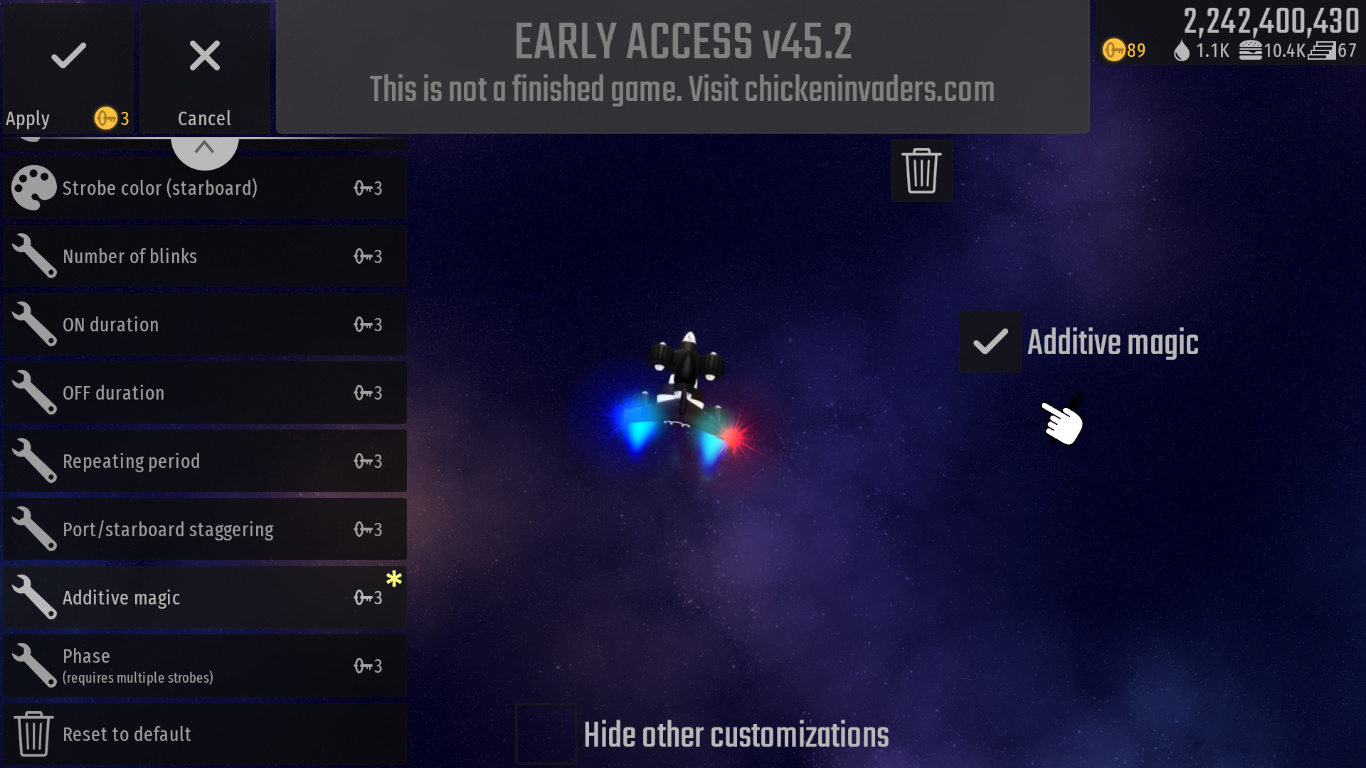
OPTIONAL: For accuracy to the original game's very strong colours, I've disabled additive magic on these strobes, but if you want to make your build more photo-realistic you can enable it.

Now, here’s the clincher - in the original game, the CI2 ship’s lights blink brighter in a looped pattern of “blue, red, none, both, none” (ignore the .gif abov, it’s wrong; if you can find some footage of the ship online and slow it down, you will see this is true). Can we do this, with only one extra pair of strobe lights???

Yes. Here’s how.

  • On the second pair of lights, set the port and starboard colours to the squares two squares right of their corresponding lights in the first pair (so lighter versions of the red-and-blue.)
  • Placement 1, just like the other pair.
  • You’ll want the number of blinks at 2.
  • ON duration should also be 2.
  • OFF duration at 5.
  • Repeating Period at 7.
  • Port/Starboard staggering needs to be 9.
  • You’ll definitely want additive magic ON for this one.
  • Maximum strobe size (23)
  • Obviously phase doesn’t matter, as the other lights are always on.

And voila! Could be a bit faster in speed, maybe, but overall I’m really happy with this. It will pulse in the correct pattern of the original game.

Other Details

I left the wingstreak off (0 opacity is the cheapest way to do this) as the classic version never had any - but if you really want one, I’d recommend white.

The shield I chose was just the default light blue, which is the same blue as the one I recommended for the outer exhaust. The police never have a shield in the classic game (or not one we see, anyway) so this is completely preferential. Make it pink, if you want.

Now all that’s left is to mount your CI2 background and take flight! :wink:


Hope you enjoy!

37 Likes

I think the base color should be gray a bit compared to the gif.

1 Like

Good job policeman !

And the music from ci2 :wink:

6 Likes

So the strobes from the tutorial will have been broken with the latest update (as they were swapped) - if you want to correct them I’ve updated the tutorial with the new port/starboard staggering value you’ll need now that it’s fixed.

Additionally I’ve also updated the weapon pod design because one of the new styles is pretty much perfect.

4 Likes

Tutorial: How to make the coffin dance paintjob in CIU

(for you who don't know what's the coffin dance, here's a video to it:

)
In this tutorial, you’ll create this:
image

Cost:

  • You’ll need approximately 200 keys.
  • This will make Charity power-ups outlines almost invisible to the naked eye.
  • A Muller M400, M404 or M408.

Instructions:

Exhaust:

  • Change your exhaust color to pure black, both outer and inner.
  • You can combine black and white for it to match more with the pallbearer.

Base Paint

  • Change the base paint to either black, dark grey or grey

Cockpit

  • Change the cockpit to brown to match the brown glasses

Fuselage

  • Change the paint to either white or bright grey.
  • Use any texture that you prefer.

Pods

  • Change the pods to pure white.
  • You should use the default pods texture.

Wing

  • Make the wing paint to white.
  • Use any texture you prefer, for example I use the default one.

Wingstreak

  • Make the winkstreak color white, don’t make it black or it’ll be barely visible.
  • Extend the wingstreak if you want.

Additional/Optional Changes

  • If you have Strobe Lights, don’t make any more changes, keep it as default or change it if you want.
  • If you have Ghost Trail, increase the length and opacity to 100%, and change the color to black.
  • If you have Laser Scope, change the color to white.
  • If you want your UI to fit with your spaceship, change the UI into black or grey.

Ending

Well done, recruit! You’re now an official member of the dance crew, which means that you’ll perform when there’s a funeral. Here’s a gift for you: :medal_sports:. Now grab your new spacecraft and give those chickens a lesson.

9 Likes

Tutorial: How to make a rainbow ghost trail:


You will need:

  • 3x Ghost Trails
  • Enough keys to customize them
  • A ship with at least three hardpoint slots

So first, go ahead and mount the three ghost trails on your spaceship.
You’ll want to make sure Additive Magic is enabled for each trail. The Density and Shrink/Expand setting are up to you (depending on what you want your finished rainbow trail to do) but to correctly achieve the effect they will all need to be at the same setting for each trail, otherwise it will be apparent that you haven’t used one, continuous trail.

First, for the colouration:

  • Make the first trail have a root colour of red (as red as possible, 255,0,0) and a tail colour of black (0,0,0)
  • Second trail needs a black root and a green (0,255,0) tail
  • Final trail also has a black root, with blue (0,0,255) tail

Optionally, if you want to “flip” the direction of the rainbow around, you can make the trail with a red root have a blue one instead, and then make the blue tail trail red to match.

Next, you’ll want to change the trail lengths. Make the third trail (the blue one) any number divisible by three - then make the second trail two-thirds the length, and the last one one-third.

The final step is getting the opacity right. This might require some manual tweaking depending on the length of your trail, and your own preferences, but for my trail I used a similar technique to the thirds above. The root (the red trail) should be any number divisible by three, then the second trail should be two-thirds of that and the final trail one-third.

The result is a very cool and beautiful trail that will look amazing with many different paintjobs and cannot be mounted on any H&C spaceships in the game unless we get purchasable hardpoints…

28 Likes

Want a Lightsaber on your ship? It’s really easy. All you need is 3 laser scopes. (or more if you want it to be brighter)

First, make two of them the colour you wish for the blade to be.
Next, make the 3rd one completely white.

Now equip them. That’s all.

16 Likes

Candy Corn (Different name Ingame)

Captura de pantalla (1786)

13 Likes

(This topic just died and didn’t get much attention, so i’ll bump it and revive it with my own paintjob):
Hello guys, Let me introduce my current paintjob that i posted in this topic:


This one which i named it candy vaporisor. now here’s how to do it:
For the exhaust:
The exhaust (outer) should be colored purple, Something like this:

And the inner exhaust should be colored anything between light yellow to dark orange:

Now for the base paint:
Well, the best i could do is to make it dark purple:

Cockpit:
Should be orange, without any brightness or darkness:

Shininess hue should be white.
Shininess strength should be at the max.
Well for the fuselage now, choose any texture you want.
Now for its color:
anything close to orange would work.

Pods texture: Once again, any texture would work.
Pods color: Same as above.
Density: max.
Wing texture: this time i prefer this texture:

works the best.
Wing color: yet again, the same as above.
Density: max.
Shield: Red-ish.

Wingstreak: well, red-ish again.

as for the opacity, i choosed the max.
length: I didn’t care about this so, anything would work.


Now for the hardpoints:
Ghost trail:
Root color:


A bit of a bright red color.
Tail color:

Now for the trail length and density: to the max.
Opacity: low.
Shrink/Expand: medium.
no additive magic.
Well for the laser scopes:
I have 4 of them, the first 3 are red, but the last one is white. so i made it look like a lightsaber as stated above.
That’s it! you did it and you’ve made the paintjob!

This post literally took over an hour to make, so apologizes if there’s many mistakes, this is my first post here yet…

11 Likes
bump

K so this is my spaceship
image
I’ll show you how
Set the base to yellow or whatever you want
image
Make others white
image
Also exhaust
image
There’s no trick in this ship, have fun turning it silver
image

4 Likes
bump

[OUTDATED] The ‘Umi no Kage’ (‘Shadow of the Ocean’)

I just recently refurbished my M408. A very similar design to @GgWw1175 and @BoggY, except the blue is not all that vibrant, some of the textures are different (pods, wing and fuselage) and the exhaust is smoky instead of shiny. I quite liked this colour, and those spacecrafts, so I combined them and got this as a result:

another_pic
I’ll show you a tutorial, if anyone wants to create it for themselves:

You’ll Need:

  • Approximately 150 keys for the customization
  • A laser scope and ghost trail (strobe lights looked a bit off)
  • A Muller M400, M404-PI, M408

Step 1:

Equip your laser scope and ghost trail to your Muller spacecraft. Next you want to enter the customization menu. Click ghost trail and make it and make the Root color pitch black and Tail color dark grey, like this:

image
Next you want to expand Density and Trail Length sliders to maximum, making it say 100% length, 100% density when you exit the menu. I like to disable additive magic, as it doesn’t fit with the exhaust. Moving on to the laser scope, you want to click ‘Advanced color selection’ and make the colors similar to this:


That’s it for Step 1.

Step 2:

Moving on to customizing the spacecraft itself, you’ll first want to choose your exhaust. I use this smoky one:


But you can use the shiny one that @GgWw1175 and @BoggY used:

For the Exhaust (inner) i preferred a pitch black, but a dark blue should look good too. The Exhaust (outer) will be the same color we used for the laser scope:

Step 3:

Now we are moving on to the main color schemes for the spacecraft. For the shield, cockpit, pods, fuselage and wing paint, we’ll stick to the blue from before. The measurements do not have to be extremely accurate, but as long as you get this serene-blue colour you should be good. The Shininess hue should be pitch black, and the Shininess strength should be the whitest one:

image
These colour options are necessary to get that black shine on the cockpit and pods that you see. It gives the spacecraft a dark shine on the cockpit and pods which gives it a sort of rough, wrecked look. For the cockpit trim, I like to keep it dark grey, the same dark grey from the Tail color on our Ghost Trail. For the fuselage texture, this one, which I thought looked pretty decent (third one, first row):

image

This one looked good for the pods texture (last one):


And I liked this one for the wings paint (third one, first row):


That’s all! This should be your finished result:


Feel free to modify as much as you like!

3 Likes

Here are my two spacecrafts, Shadow Astra, an updated version of the Umi no Kage, and Mystic Blossom, my Hatchling I haven’t reviewed yet:

3 Likes

Police painjob, but it is mine

11 Likes

why the heck you would bump a topic for that??? delete that

because that against the rules

5 Likes